Craftiosity is the perfect subscription for anyone who enjoys making things and being creative. Every month they send you a different project, covering a variety of media and crafty techniques. I love making things, and this is a great way to try my hand at things I wouldn’t normally do in my regular hobbies.

This month’s project is something I’ve never tried before – The English Paper Piecing Tote Bag. English Paper Piecing is a hand-sewing technique that uses paper shapes as templates for fabric pieces, which are then removed and the fabric pieces stitched together. Generally the shapes and pattern are quite geometric. While I had an idea that quilts or patchwork can be made in this way, I’ve never come across this term before, and had only the vaguest idea of how it worked! But it looked like an exciting project, and I especially like the idea of decorating a tote bag because I use them a lot.

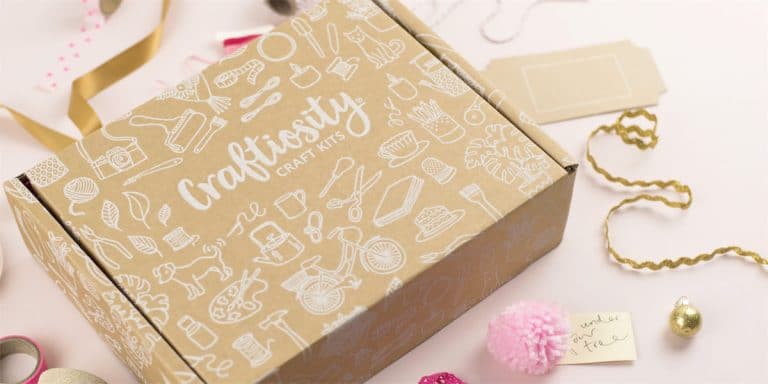
Inside the box is everything you need to create your project. There’s fabric in four colours, templates to cut out, needles and thread, a blank tote bag, plus cards for your pinboard plus, of course, extensive instructions.
The only things you need to provide are things like a pencil and scissors, and it’s fairly reasonable to assume that everyone will have these basic things in their home! An iron is also useful, but not essential, as the instructions tell you what to do if you don’t have one.

The first thing to do was to cut out the patterns. There were 18 small diamonds, which were for the fabric pieces, and three larger ones, which you use to cut out the fabric pieces. They’re larger because you need to have space to turn in the edges of the fabric. Making the pieces was easy, you just draw around the big diamonds on the fabric and cut them out.

Next was creating the individual fabric pieces. You place a smaller diamond inside a fabric diamond, and then iron (or press a crease with your fingers, according to the instructions), then make large tacking stitches over the edges into the paper to keep them in place. While my sewing skills are limited to name tapes and buttons, I do know what a tacking stitch is, so this part was pretty easy. I did have to be careful not to pull them too tight and make the paper bend, but as long as you’re careful it’s simple enough.
You end up with a pile of 18 fabric and paper diamonds. I went over them again with my little craft press just to make sure the creases were nice and straight.

The next part was arranging them in groups of three, each of different colours. This would give your individual pieces that would them be sewn together. These were sewn with a very small stitch across the two edges pressed together. I needed to be careful not to sew through the actual paper itself, because those paper pieces are going to be removed and you don’t want them stuck!
lHaving made the tripe pieces, it was time to arranged them so there were no same colours touching. You can see the planned pattern on the right. First each pair in a row would be sewn together exactly as the individual diamonds were, and then each row would be attached to make a whole single piece.
I can see how the paper is so useful here as it gives the pieces structure, as it would be far more difficult to handle them and sew them neatly together without it.

Once they were all joined, it was time to remove the paper. This meant cutting the tacking stitches and just removing the paper. I was pleased to discover that I had managed to avoid sewing the paper into the fabric when sewing the pieces together, as I was quite concerned I had caught it in a few places. But they all came out quite easily, and then it was just a matter of removing all the little bits of thread from the tacking and making it look tidy. I also went over it once again with my mini press to make it all as flat as possible.
Once the paper was out, it was time to place the finished piece on the bag.
Now, as you can see from the middle picture, I managed to sew the shapes together wrong! Instead of the bottom row going back to the left, I had actually sewn it to the right, making it go across rather than kind of a zigzag. (Compare it to the picture above that and you’ll see what I mean.) But fortunately it didn’t really matter, because there weren’t any same colours touching, and much to my relief it still fitted on the bag!
Finally, sewing the white thing onto the tote bag itself. I used pins to keep it in place, but you could also use more tacking stitches, the instructions suggested both. The same tiny stitches were used to attach it, and I doubled the thread to make sure it was nice and strong.
It was necessary to be careful not to pull and distort either the pattern or the bag itself, because you wouldn’t want any funny-looking places where there were puckers or stretches. So I took my time, sewed carefully, and it worked perfectly!

If you look closely you can see the stitching between the diamonds, and there’s and edge on the right that isn’t perfectly straight. But overall I think the effect is marvellous, even if the shape wasn’t quite what I had originally planned! I should have gone over it one more time with the press to make it perfectly flat, but I think that once it’s filled with shopping and tiny wrinkles won’t be noticeable at all.
Like I said, my sewing skills are limited, but I was incredibly impressed that I was able to produce something that looks like this. The instructions, as always, were beautifully clear, and there’s also a video if you prefer to follow along with somebody actually doing as you go.
A quite note on the tote bag itself – it’s a nice one, thick cotton with a gusset at the bottom to give you more space, not one of those thin cheapie things that are basically a pocket with handles. This is definitely a properly useable bag.