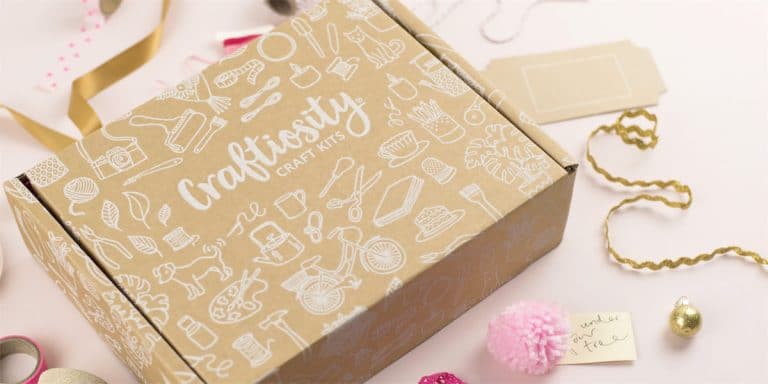
Craftiosity is a marvellous subscription box for the creatively-minded. If you like making things that are pretty and useful, you guided though making something lovely with a wide variety of media and techniques.
Each box contains everything you will need to complete the project, apart from regular household items like scissors and tape. Otherwise you don’t need any special equipment at all.

This project is to make Gilded Clay Decorations. The decoration specified is a little hanging plaque with a holder for a sprig, flower, or even a little note. These can be used as Christmas ornaments, or for decor at any time of the year. As you are also going to decorate them you could make them as gifts and personalised for the recipient.
Inside the box is the clay of course, which is air-dry – you don’t need a kiln! Also the tools you’ll need, a little rolling pin, sandpaper, paint and paintbrush, cord, toothpicks, templates, and even a dust mask.
You also get some lovely postcards for your mood board, scrapbooking, or even just to send!
The instructions are absolutely superb. They’re step-by-step with each step properly illustrated and explained. There’s also an option of an instruction video, which is useful if you are better at following along and copying what somebody is demonstrating. In the various Craftiosity projects I’ve done I’ve used both written and video instructions, and they are both very easy to follow.
This project takes a couple of sessions over a few days.

The first thing to do is to prepare your templates. These are provided and you just cut them out of a printed sheet. You also need to make little cardboard rolls (you use cardboard from the box itself).
Then you portion out the clay, roll it out, and use the toothpick (included!) to cut out your shapes, one for the plaque and one for the little holder.

Air dry clay is easy to work with, and it’s very tactile! It rolls out easily, though you need to be careful with the surface not starting to dry out.
Putting them together is fairly easy, though you need to be careful with the placement. You need to smooth down the edges of the holder as much as possible to make it neat. You also use a toothpick to make holes in the top to hang them up, which I nearly forgot to do! The little cardboard rolls are there so the holder keeps its shape while it dries.
I had some clay left over, so I decided to use some biscuit cutters to cut out some extra shapes.
The clay took about three days to dry properly. The weather is pretty cold and damp right now, so I suspect in the summer it would be a little faster. But it’s quite nice to have a project in stages, even if I was getting a little bit impatient waiting for it all to dry!

Once they were all nice and dry, it was time to use the sandpaper. The surfaces weren’t exactly rough, but sanding them down, especially the edges, makes everything look a little neater. It also meant I could sand out some of the more obvious bumps and dents. In the first pictures in a sanded decoration on the left, and an unsanded on the right. You can see that the surface is just a little bit more even. The sanding also helped smooth out the surfaces that had wrinkled slightly when they were first drying and I moved them.
Having a dust mask included was very useful indeed, because you can see in the middle how much dust came off from the sanding!
Once they were as smooth as I could get them, it was time to get paining. The pain included was a metallic bronze acrylic, which is a little darker than gold. Acrylic paint is also very easy to work with, it goes on nicely and dries fast. There was also a fine paintbrush included.
The instructions suggested a couple of designs to copy, or you could go off-piste and create your own. They suggest working out your design on paper first, and also practising your painting, which is good advice! I also used a couple of my extra cut-out shapes to practise on. You can even lightly sketch what you want to do on the clay, to make sure you get spacing etc. correct.

These are what I ended up with. The one on the right was the same design as in the instructions, then I decided to do a couple of variations for the other two. As for the little shapes, I just sort of winged it! One advantage of those is that if it went wrong I could just turn it over and use the other side. it was also nice to be able to use up the clay, though you could use any shapes, I just happened to have Christmas cookie cutters that worked perfectly. I debated using some other colours, as I have a ton of acrylic paint, but I decided that the bronze was perfect, and I quite like having complementary little ornaments to go with the bigger ones.
If you look you can still see that the surfaces aren’t perfect, but I don’t really think it matters too much. My painting is also a long way from perfect, but again, it’s supposed to be a handmade look!
I think the bronze paint looks absolutely lovely. The slightly darker shade really pops and looks beautiful against the white clay. It also has a lovely metallic sheen.
There was gold cord included in the box, which I added to the plaques to hang them up, though I might use something different, perhaps white. I’ll figure it out when I hang them up!

As for the little pockets, this is what they look like with something in them. These are little mini decor picks, and I think they look equally nice with the mini pine cones and with green and red sprigs. You could even put air plants in them which don’t need any water, and use them all year round.
Either way, they are great for general decor and for a festive theme.